How to connect two laptop screens
You can connect two screens between laptops in just a few minutes. Wired or wireless, both options let you expand your workspace fast. Don’t worry if you run into a hiccup—most issues have simple fixes. > With the right steps, you’ll feel confident making the connection, even if you’ve never tried it before.
Key Takeaways
Choose between wired and wireless methods to connect two laptop screens based on your needs. Wired connections offer stability and high video quality, while wireless options provide flexibility.
For wired connections, use HDMI or USB-C cables for the best performance. Simply plug in the cable, adjust settings, and enjoy a seamless dual-screen experience.
Wireless connections like Miracast for Windows and AirPlay for macOS allow you to connect without cables. Ensure both devices are compatible and on the same network for smooth operation.
If you encounter issues like a black screen or display not detected, check your cables, restart devices, and update drivers. Most problems have simple fixes.
Adjust display settings after connecting to optimize your experience. Use the 'Extend' option for multitasking or 'Duplicate' to mirror screens, and tweak resolution for clarity.
Main Ways to Connect Two Screens
You have two main options when you want to connect two screens between laptops: wired and wireless. Each method has its own strengths, so you can pick what works best for your setup and needs.
Wired Methods Overview
Wired connections give you a stable and reliable way to connect two screens. You usually get the best video quality and almost no delay. If you want a simple setup, you can use cables like HDMI, USB-C, or even an Ethernet cable. These methods work well if you don’t plan to move your laptops around much.
Here are the most common wired options:
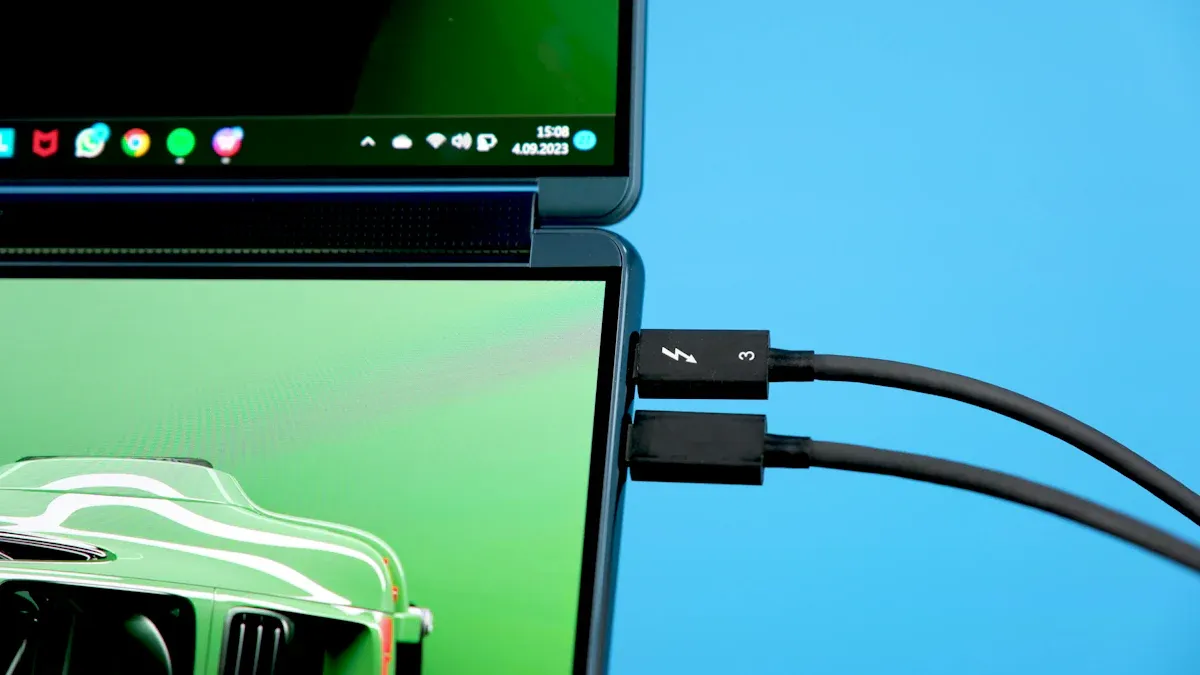
HDMI or USB-C cable
Ethernet cable
You just plug in the cable, adjust a few settings, and you’re ready to go. Wired methods are great if you want a fast and steady connection.
Wireless Methods Overview
Wireless methods let you connect two screens without any cables. This gives you more freedom to move your laptops around. You can use built-in features like Miracast on Windows or AirPlay on macOS. There are also third-party apps that help you share your screen over Wi-Fi.
Here are some popular wireless options:
Miracast (Windows)
AirPlay (macOS)
Wi-Fi Direct
Third-party apps
Wireless connections are handy if you want flexibility, but you might notice a little delay or lower video quality, depending on your network.
Tip: If you’re not sure which method to try, check out this quick comparison:
Feature | Wired | Wireless |
|---|---|---|
Connection Stability | High | Depending on network |
Latency | Low | Medium or high |
Video Quality | High | Depending on connection |
Mobility | Low | High |
Setup Complexity | Low | Medium |
Device Compatibility | Medium | High |
Power Consumption | Low | High |
You can connect two screens using either method. The next sections will walk you through each step, so you can pick the best way for your laptops.
Wired Methods
Wired connections give you a solid and dependable way to connect two screens between laptops. You get crisp visuals, smooth performance, and fewer hiccups. Let’s walk through the main wired options and how you can set them up.
HDMI or USB-C Connection Steps
Most modern laptops come with either HDMI or USB-C ports. These ports make it easy to connect two screens and expand your workspace. Before you start, check which ports your laptops have. If both have HDMI, grab an HDMI cable. If you see USB-C, you might need a USB-C to HDMI adapter or a USB-C dock.
Here’s a quick look at how HDMI and USB-C compare:
Feature | HDMI | USB-C |
|---|---|---|
Audio/Video Quality | Supports audio up to 7.1 channels and video up to 4K at 60 Hz | |
Data Transfer | Limited to audio and video | Versatile: audio, video, data, and power transfer |
Power Delivery | Not designed for power transfer | Can deliver up to 100W for quick charging |
Compatibility | Widely used in multimedia devices | Increasingly common in smartphones and laptops |
Distance Limit | About 15 meters (50 feet) | N/A |
HDMI Advantages: You get high-quality audio and video. HDMI works with most TVs, monitors, and projectors.
HDMI Disadvantages: HDMI only handles audio and video. It can’t charge your laptop or transfer files.
USB-C Advantages: USB-C does it all—audio, video, data, and even charging. It’s becoming the standard for new laptops.
USB-C Disadvantages: Sometimes, USB-C ports don’t support video (look for a lightning bolt or “DP” symbol). Some adapters may lower the signal quality.
Many laptops, including Macs, PCs, and Chromebooks, support dual displays through HDMI or USB-C. Some Windows laptops let you connect up to six screens, while Macs can handle up to four.
Ready to set up your screens? Here’s how you do it with USB-C (the steps are similar for HDMI):
Plug the USB-C cable from your dock into your laptop’s USB-C port.
If your power cable uses USB-C, connect it to the dock. If not, plug it into your laptop.
Connect your monitor’s VGA or HDMI cable to the dock.
Make sure both your laptop and monitor have power.
Plug in your power strip and turn it on.
Power on your laptop and monitor, then log in.
Press
Windows + Pto open display options.Choose “Extend” to use both screens at once.
Enjoy your new setup! Move windows between screens and get more done.
💡 Tip: If your laptop doesn’t detect the second screen, double-check your cables and try restarting both devices.
Ethernet Cable Setup
You can also connect two screens using an Ethernet cable. This method works best if you want to share files or use one laptop as a second display over a wired network. Here’s what you need to do:
Connect both laptops with an Ethernet cable.
Set both laptops to a private network in your network settings.
Open Device Manager and check that your network adapters are enabled.
In Network Connections, right-click each adapter and make sure they’re enabled.
Restart both laptops after you finish the setup.
Check your IPv4 settings to confirm both devices are on the same network.
To share folders, right-click the folder, go to Properties > Sharing > Advanced Sharing, and set permissions for “Everyone.”
This method gives you a stable connection and works well if Wi-Fi isn’t reliable. You can use built-in Windows features like “Projecting to this PC” to mirror or extend your display over the network.
🛠️ Note: Ethernet connections don’t transfer video directly like HDMI or USB-C. You’ll need to use screen sharing or remote desktop features to actually display your screen on the other laptop.
Adjusting Display Settings
Once you connect two screens, you might need to tweak your display settings for the best experience. Windows and macOS both let you customize how your screens work together.
Common issues and quick fixes:
Issue Description | Resolution |
|---|---|
Images don’t align on monitors of different size | Adjust a monitor’s resolution scaling or set the same scale for both monitors. |
Other monitors have the wrong aspect ratio | Review resolution settings, switch cables, check TV settings for overscan/underscan. |
Game displaying on the wrong monitor | Use in-game settings to select the primary monitor, check display outputs, or set the desired monitor as primary. |
Use the Windows + P keys to select 'Extend' or adjust display settings to change the view. |
To adjust your display settings on Windows:
Right-click on your desktop and select “Display settings.”
Scroll down to see both screens. Drag and drop to match their physical layout.
Choose “Extend” to use both screens separately or “Duplicate” to mirror them.
Adjust resolution and scaling for each screen to make text and images look right.
Set your main display by selecting the screen and clicking “Make this my main display.”
On macOS, open “System Preferences” > “Displays” to arrange and scale your screens.
🎯 Pro Tip: If your screens look blurry or stretched, try changing the resolution or scaling until everything looks sharp.
With these wired methods, you can connect two screens quickly and enjoy a bigger, more flexible workspace.
Wireless Methods
Wireless options give you the freedom to connect two screens without any cables. You can move your laptops around, set up in different rooms, or even work from the couch. Let’s look at the main wireless methods you can use on Windows and macOS, plus some handy third-party apps.
Windows Wireless Display (Miracast)
Miracast lets you share your Windows laptop screen wirelessly with another device. You don’t need extra software if your laptops support Miracast. You just need to check your hardware and operating system first.
Here’s what you need for Miracast:
Requirement Type | Details |
|---|---|
Operating System | Windows 8.1 or newer |
Hardware Support | Built-in Miracast support or external dongle |
Additional Note | Confirm Miracast support with monitor manufacturer |
If your laptops meet these requirements, you can start connecting:
Open the Action Center by pressing
Windows + A.Click “Connect” and look for your other laptop in the list.
Select the device you want to project to.
Accept the connection request on the second laptop.
Choose “Duplicate” or “Extend” to set up your screens.
💡 Tip: If you don’t see your device, check if Miracast is enabled in your display settings. Some older laptops may need a Miracast dongle.
You might notice that Miracast works well most of the time, but some users report that the built-in Windows Wireless Display feature can be unreliable. If you run into problems, you can try a Miracast adapter or look at third-party solutions for better stability.
macOS AirPlay and Sidecar
Apple gives you two great ways to connect two screens wirelessly: AirPlay and Sidecar. AirPlay lets you mirror or extend your Mac’s display to another Mac or compatible device. Sidecar turns your iPad into a second screen for your Mac.
First, check if your devices are compatible:
Device Type | |
|---|---|
Mac | Late 2015 27" iMac or newer |
Mid 2016 MacBook Pro or newer | |
Late 2018 Mac mini or newer | |
Late 2018 MacBook Air or newer | |
Early 2016 MacBook or newer | |
2019 Mac Pro | |
2017 iMac Pro | |
iPad | All iPad Pro models |
iPad (6th generation) or later | |
iPad mini (5th generation) | |
iPad Air (3rd & 4th generation) | |
Wireless Connection | Both devices must be within 10 meters (30 feet) |
Bluetooth, Wi-Fi, and Handoff must be enabled | |
iPad must not share cellular connection | |
Mac must not share internet connection |
Ready to connect two screens with AirPlay or Sidecar? Here’s how you do it:
Make sure your Mac and iPad meet the system requirements.
Connect your iPad to your Mac with a charge cable if you want wireless use.
Click the AirPlay icon in your Mac’s menu bar and select your iPad.
Your iPad will now extend your Mac desktop.
To mirror your display, go back to the AirPlay menu and choose the mirror option.
To disconnect, return to the AirPlay menu and select disconnect.
🖥️ Note: If you don’t see the AirPlay icon, check your Wi-Fi and Bluetooth settings. Both devices need to be close together and on the same network.
Third-Party Apps
Sometimes, built-in wireless features don’t work as smoothly as you’d like. You can use third-party apps to connect two screens and get extra features or better reliability.
Duet Display is a popular choice. You can use it to turn your iPad or another laptop into a second screen. It offers zero-lag performance over USB and a wireless mode for more flexibility. Designers and editors love it because it turns an iPad into a precision input tool.
Deskreen is another handy app. It lets you use any device with a web browser as a secondary screen for your computer over WiFi. You can mirror your screen or share specific windows, which is great for multitasking.
“The built-in Windows 11 Wireless Display feature is described as 'completely unreliable at best and completely worthless at worst,' indicating significant issues with its performance. Users report inconsistent functionality, with some experiencing weeks of frustration trying to get it to work. In contrast, third-party solutions, such as a Miracast adapter, are suggested as alternatives that may provide better stability and additional features.”
If you want a reliable way to connect two screens wirelessly, third-party apps often give you more control and fewer headaches. You can try different apps to see which one works best for your setup.
🚀 Pro Tip: Always check compatibility before installing a third-party app. Some apps work better with certain operating systems or devices.
Wireless methods make it easy to connect two screens and boost your productivity. You can choose the built-in features or explore third-party apps for more options.
Troubleshooting
Even with the right setup, you might run into problems when you try to connect two screens. Don’t worry—most issues have simple fixes. Let’s look at some common problems and how you can solve them.
No Signal or Black Screen
You might see a black screen or a “No Signal” message when you connect your laptops. Here are some reasons this happens:
The laptop screen could be cracked or damaged.
The computer may switch to Extended Display mode and not recognize the external monitor.
Sometimes, the HDMI cable works with other devices, so the problem isn’t the cable.
Software or driver conflicts can also cause this issue.
Try these steps to fix it:
Press
Windows + Pand select “Computer Only” or “Disconnect Projector.”Do a hard reboot: remove the battery and unplug the AC adapter, then hold the power button for 20 seconds.
Uninstall and reinstall your graphics driver in Device Manager.
Download the latest driver from your laptop’s manufacturer and restart.
Make sure your brightness is set to maximum.
Connect an external monitor to check if your laptop’s LCD is the problem.
Disconnect all non-essential devices.
💡 If nothing works, a system restore might help, but use it as a last resort.
Display Not Detected
Sometimes, your laptop doesn’t detect the second screen. Here’s what you can do:
Check that all cables and ports are secure.
Try a different HDMI or USB port.
Go to your display settings and click “Detect.”
Update or reinstall your USB and monitor drivers.
Test the port with another device.
Unplug and replug the monitor to reset it.
Run the Windows Troubleshooter for hardware issues.
Consider updating your BIOS/UEFI if nothing else works.
Resolution or Orientation Issues
If your screens look blurry or the orientation is off, follow these steps:
Open Windows Settings with
Win + I.Go to System > Display.
In the Scale & layout section, adjust the Display resolution dropdown.
Pick the “Recommended” option for best results.
For orientation, use the Display orientation dropdown and choose Landscape or Portrait.
Update your monitor drivers if things still look wrong.
If problems started after a Windows update, try rolling back the display adapter driver.
🖥️ Always check that your external monitor’s resolution matches its highest supported setting for the best picture.
If you want the easiest and most reliable way to connect two laptop screens, HDMI is your best bet. Check out this quick comparison:
Connection Method | Advantages | Disadvantages |
|---|---|---|
HDMI | Better picture quality, supports audio, higher refresh rates and resolutions, single cable for audio and video | None significant for modern use |
Try the steps above and use troubleshooting tips if you run into problems. Choose HDMI for newer laptops or VGA for older ones. When you connect two screens, you boost productivity, multitask with ease, and compare data faster. You’ll notice work feels smoother and more organized.
FAQ
Can I connect two laptops as dual monitors?
You can use Windows “Projecting to this PC,” Miracast, or third-party apps to turn one laptop into a second screen. You need both laptops on the same network. Wired connections like HDMI do not work for laptop-to-laptop display.
What cables do I need for a wired connection?
You need an HDMI or USB-C cable for most setups. Check your laptop ports first. If you use Ethernet, you need a standard Ethernet cable, but this only helps with file sharing or remote desktop, not direct screen extension.
Why won’t my laptop detect the second screen?
Check your cables and ports. Try restarting both laptops. Update your display drivers. Use the “Detect” button in display settings. If nothing works, test with another cable or monitor to find the problem.
Is wireless screen sharing safe?
Wireless screen sharing is safe if you use trusted apps and secure your Wi-Fi network. Avoid public networks. Always check app permissions before installing. You can disconnect anytime if you notice anything strange.
How do I fix blurry or stretched images?
Open your display settings. Adjust the resolution to the recommended value for each screen. Change scaling if text looks too big or small. Try different cables if the problem continues. Most issues fix with a quick settings change.
See Also
Top Software Solutions for Optimizing LED Screen Displays
Effective Ways to Safeguard Your Eyes from Screens
Understanding the Differences Between LCD and LED Displays
Enhancing Learning Experiences with Classroom Screen Technology